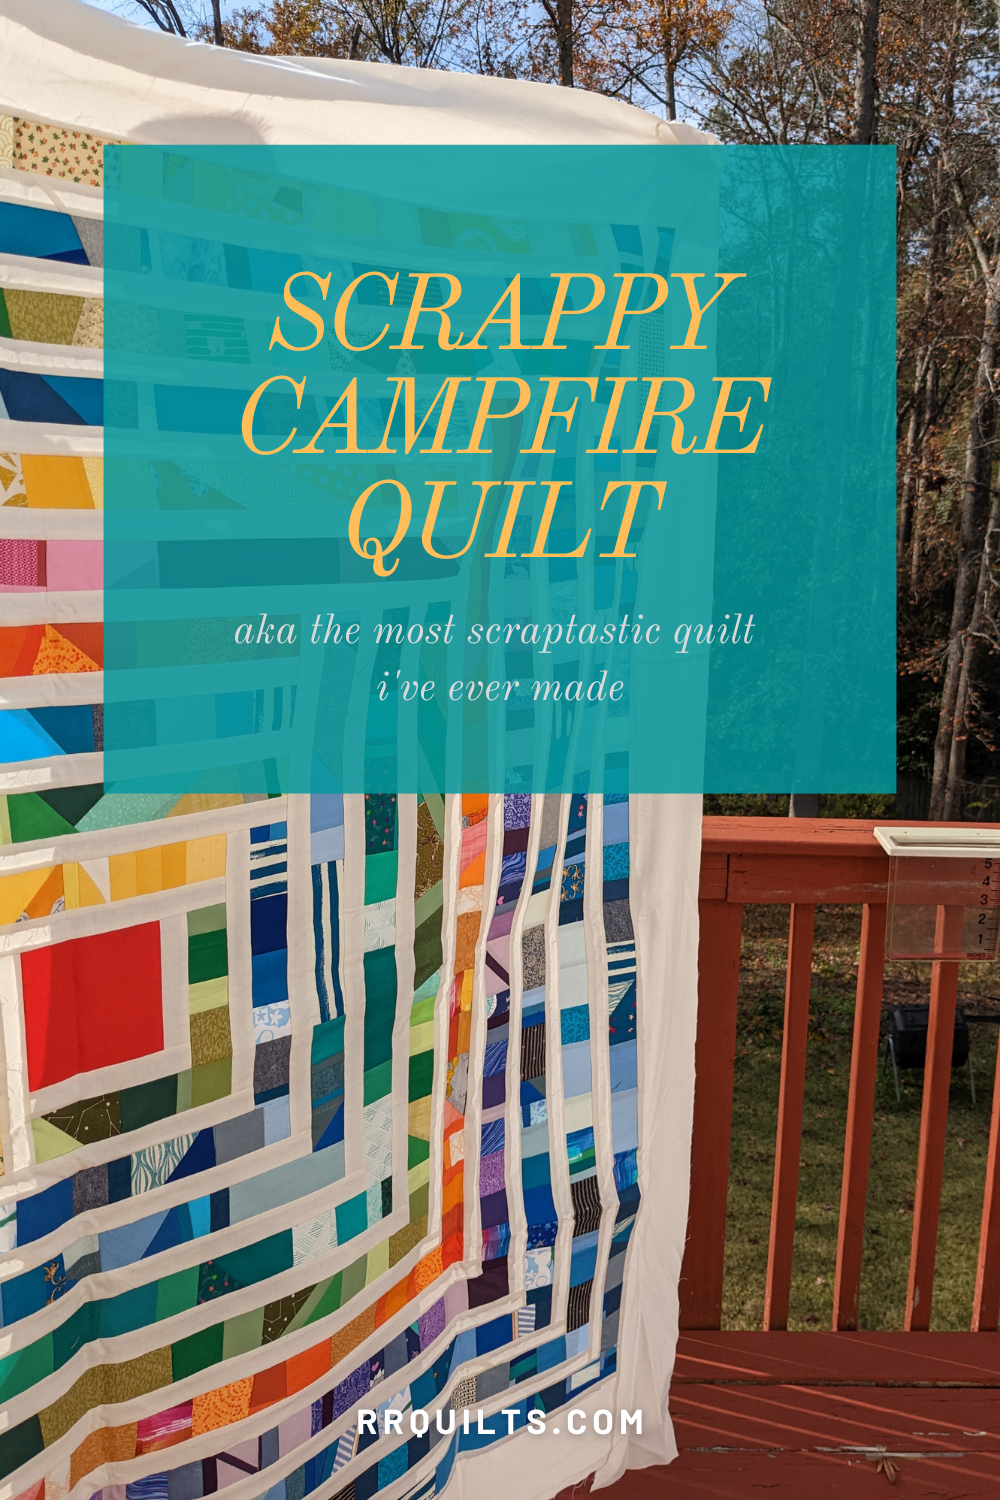

Ages ago, when I first started quilting, I bought the Campfire pattern by Suzy Quilts (this isn’t an affiliate link, just a regular one ;)). That same day, I also bought something like a dozen patterns! Like most of them, Campfire languished on my computer unopened and unmade. That is, until I found out about using adding machine tape to make scrappy quilts. Immediately, I thought of this pattern. Those long strips in this modified log cabin block are perfect for this scrap method.
I found out about using adding machine tape from a video by Just Get it Done Quilts. The method is described in detail in the video (and I’ve included more detail in the blog below!), but basically, the idea is that you sew your fabric “crumbs” onto a paper as a way to stabilize them. You can then use all of those strips directly in your favorite pattern or improv quilting however you wish!
When I began this project, it was a way to use up my scraps, but I actually started sewing it as a way to clear my mind while my husband was recovering from a major surgery. I needed something that was almost mindless, a project that I could get lost in. So, I pulled out my scrap bags and got to work!
I find that scrappy quilts often leave me feeling overwhelmed, so I wanted to set some guidelines for myself when starting this project. For me, that meant that each “leg“ of the log cabin had to be comprised of scraps of only one color family. I tend to organize my scraps by color (e.g. reds, oranges and yellows, browns, greens, teals, blues, pinks, purples, etc.), so that goal was fairly easy to achieve. Generally speaking, I followed the color placement guidelines included in the pattern, but I did deviate from it when I ran low on a particular color, or needed to break up a big block of cool colors. This pattern is great for a project like this since non of the colored strips touch one another- each is separated by background fabric. That part of the pattern design really helped me tone down the feeling of chaos.


To get started, I cut a strip of adding machine tape about an inch longer than indicated in the pattern so I’d have some wiggle room. If it’s easier for you, you could certainly cut it in to 12 or 18 inch lengths and sew those together to the desired length. I did find some of the longer pieces a bit unwieldy. If you’re not familiar, adding machine paper is essentially just receipt paper, a thing easily tearable paper on long rolls. I chose not to get the thermo-bond type, just regular paper. It comes in several widths and can easily be found at an office supply store or in the office supply section of somewhere like Walmart. I chose a width a bit larger that what the pattern called for, so I trimmed down my strips after sewing the scraps to the paper.
Next, I began sewing my scraps to the adding machine tape. Overall, this process is a bit like improv FPP (foundation paper piecing), or quilt as you go techniques, but not exactly like either one. You’ll begin with the paper on the bottom followed by a scrap, (right side up), followed by a scrap (right side down), aligning the edges of the scraps. Sew on the aligned edge. Press the pieces opened. You’ll be forced to press your seams to the side like when doing FPP, since the fabric is being seen to the paper, like in FPP.
Continue sewing and pressing until you’ve reached the end of the strip. Then you’re ready to trim! I use the longest ruler I have (24”) and simply trim in sections. I personally found it easiest to trim one complete edge at a time. I found it easiest to trim from the back, so the paper was visible. I used the edge of the paper as a reference point, and trimmed along one edge of the paper for the first edge. To trim the second side, I could then use the line I just cut as the reference point. I cut to the width indicated in the pattern. If you’re not planning to use these strips in a pattern, you can trim both sides using the paper as a guide.
Now you’re ready to sew the scrappy improv strips into your pattern! I recommend leaving the papers in until the project is done. That way, your sewing isn’t affected by any stretching that may occur and the extra seams won’t fray.
Finally, when you’re ready, remove the papers. It’s quite a tedious task, so just relax and make the best of it!


Why it works:

-
This method is helpful because it allows you to use up those scraps that otherwise may be classified as ” unusable”.
-
The paper helps stabilize everything so you don’t have to worry about these strips stretching or warping with all the extra seams and different fabric orientations and fabric weights. I do found it helps prevent fraying.
-
See that stack of skinny blue stripes on the left? I sewed that together first before adding to the scrappy strip.

Tips and tricks:
-
Mix up small and large scraps. This helps break up the visual block of TONS OF PIECES and helps you feel motivated and see some progress on your project. If you use all small pieces, it takes longer overall.
-
Try to use scraps that are approximately the width of your paper strips. Avoid or trim scraps that overhang by more than an inch so they don’t get in your way.
-
If you want to use tiny crumbs, sew them together first to make a piece that’s as least as wide as your paper. This is helpful for a few reasons- it avoids partial seams on the paper, it reduces the number of seams you’ll need to tear the paper from, and it allows you to practice some tiny piecing 😋.
-
I recommend pressing away from the scrappy strips. It’s just easier with all of those seams.

- The quilt can be heavier than normal with the extra seams and paper. I used heavy things to anchor the quilt on my cutting table and ironing board. Just household items like canned goods or heavy books were a huge help!

Leave a comment